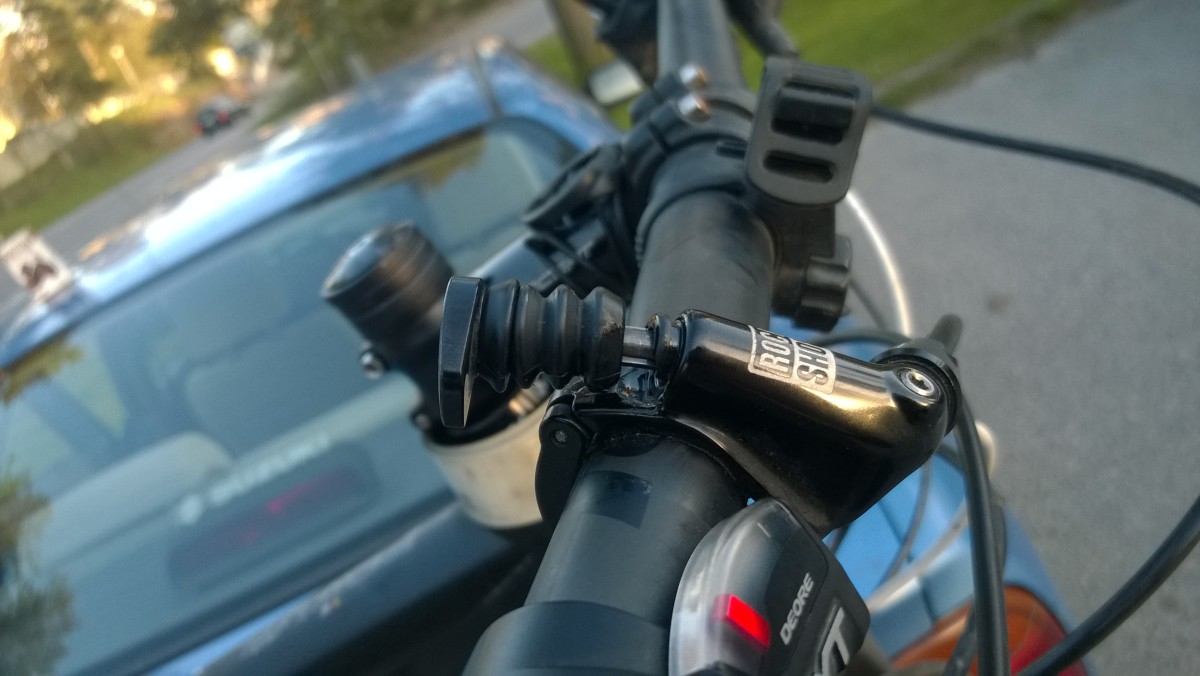
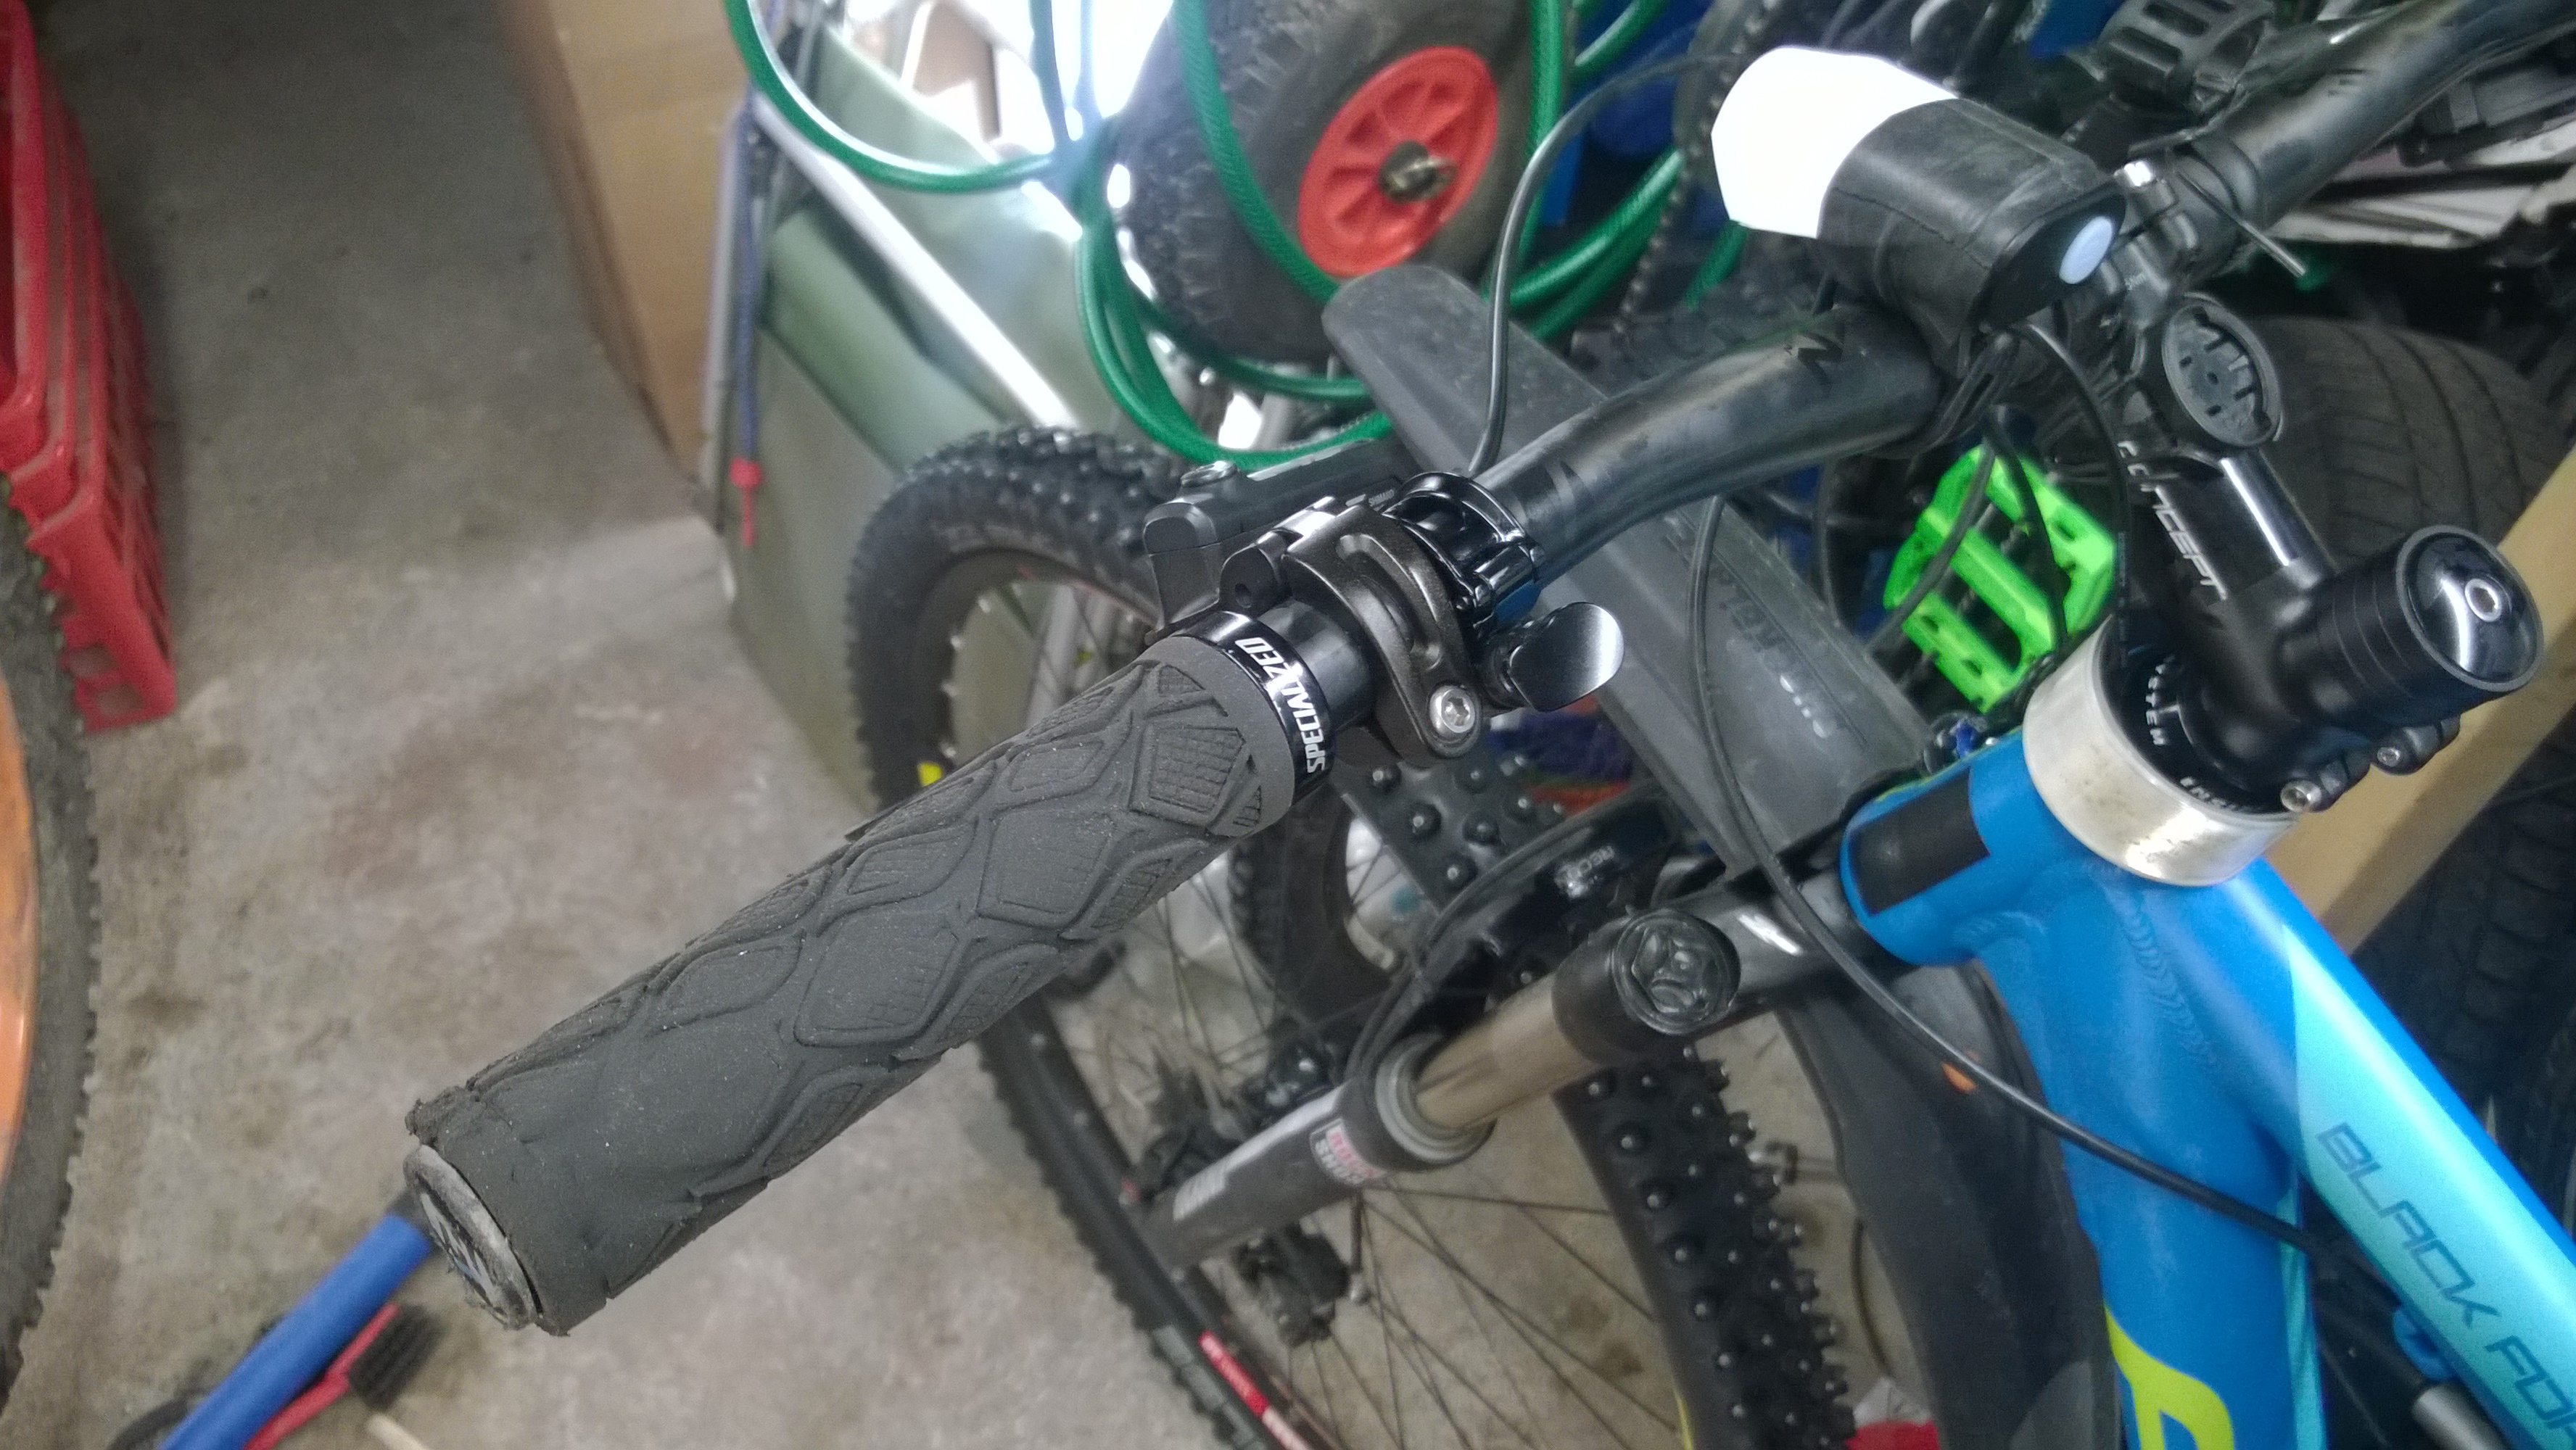
Last summer I managed to ride into a pretty severe OTB (over the bar), which resulted in a few weeks break from driving, buying knee and elbow protectors and the most severe of them all, a broken Reverb remote.
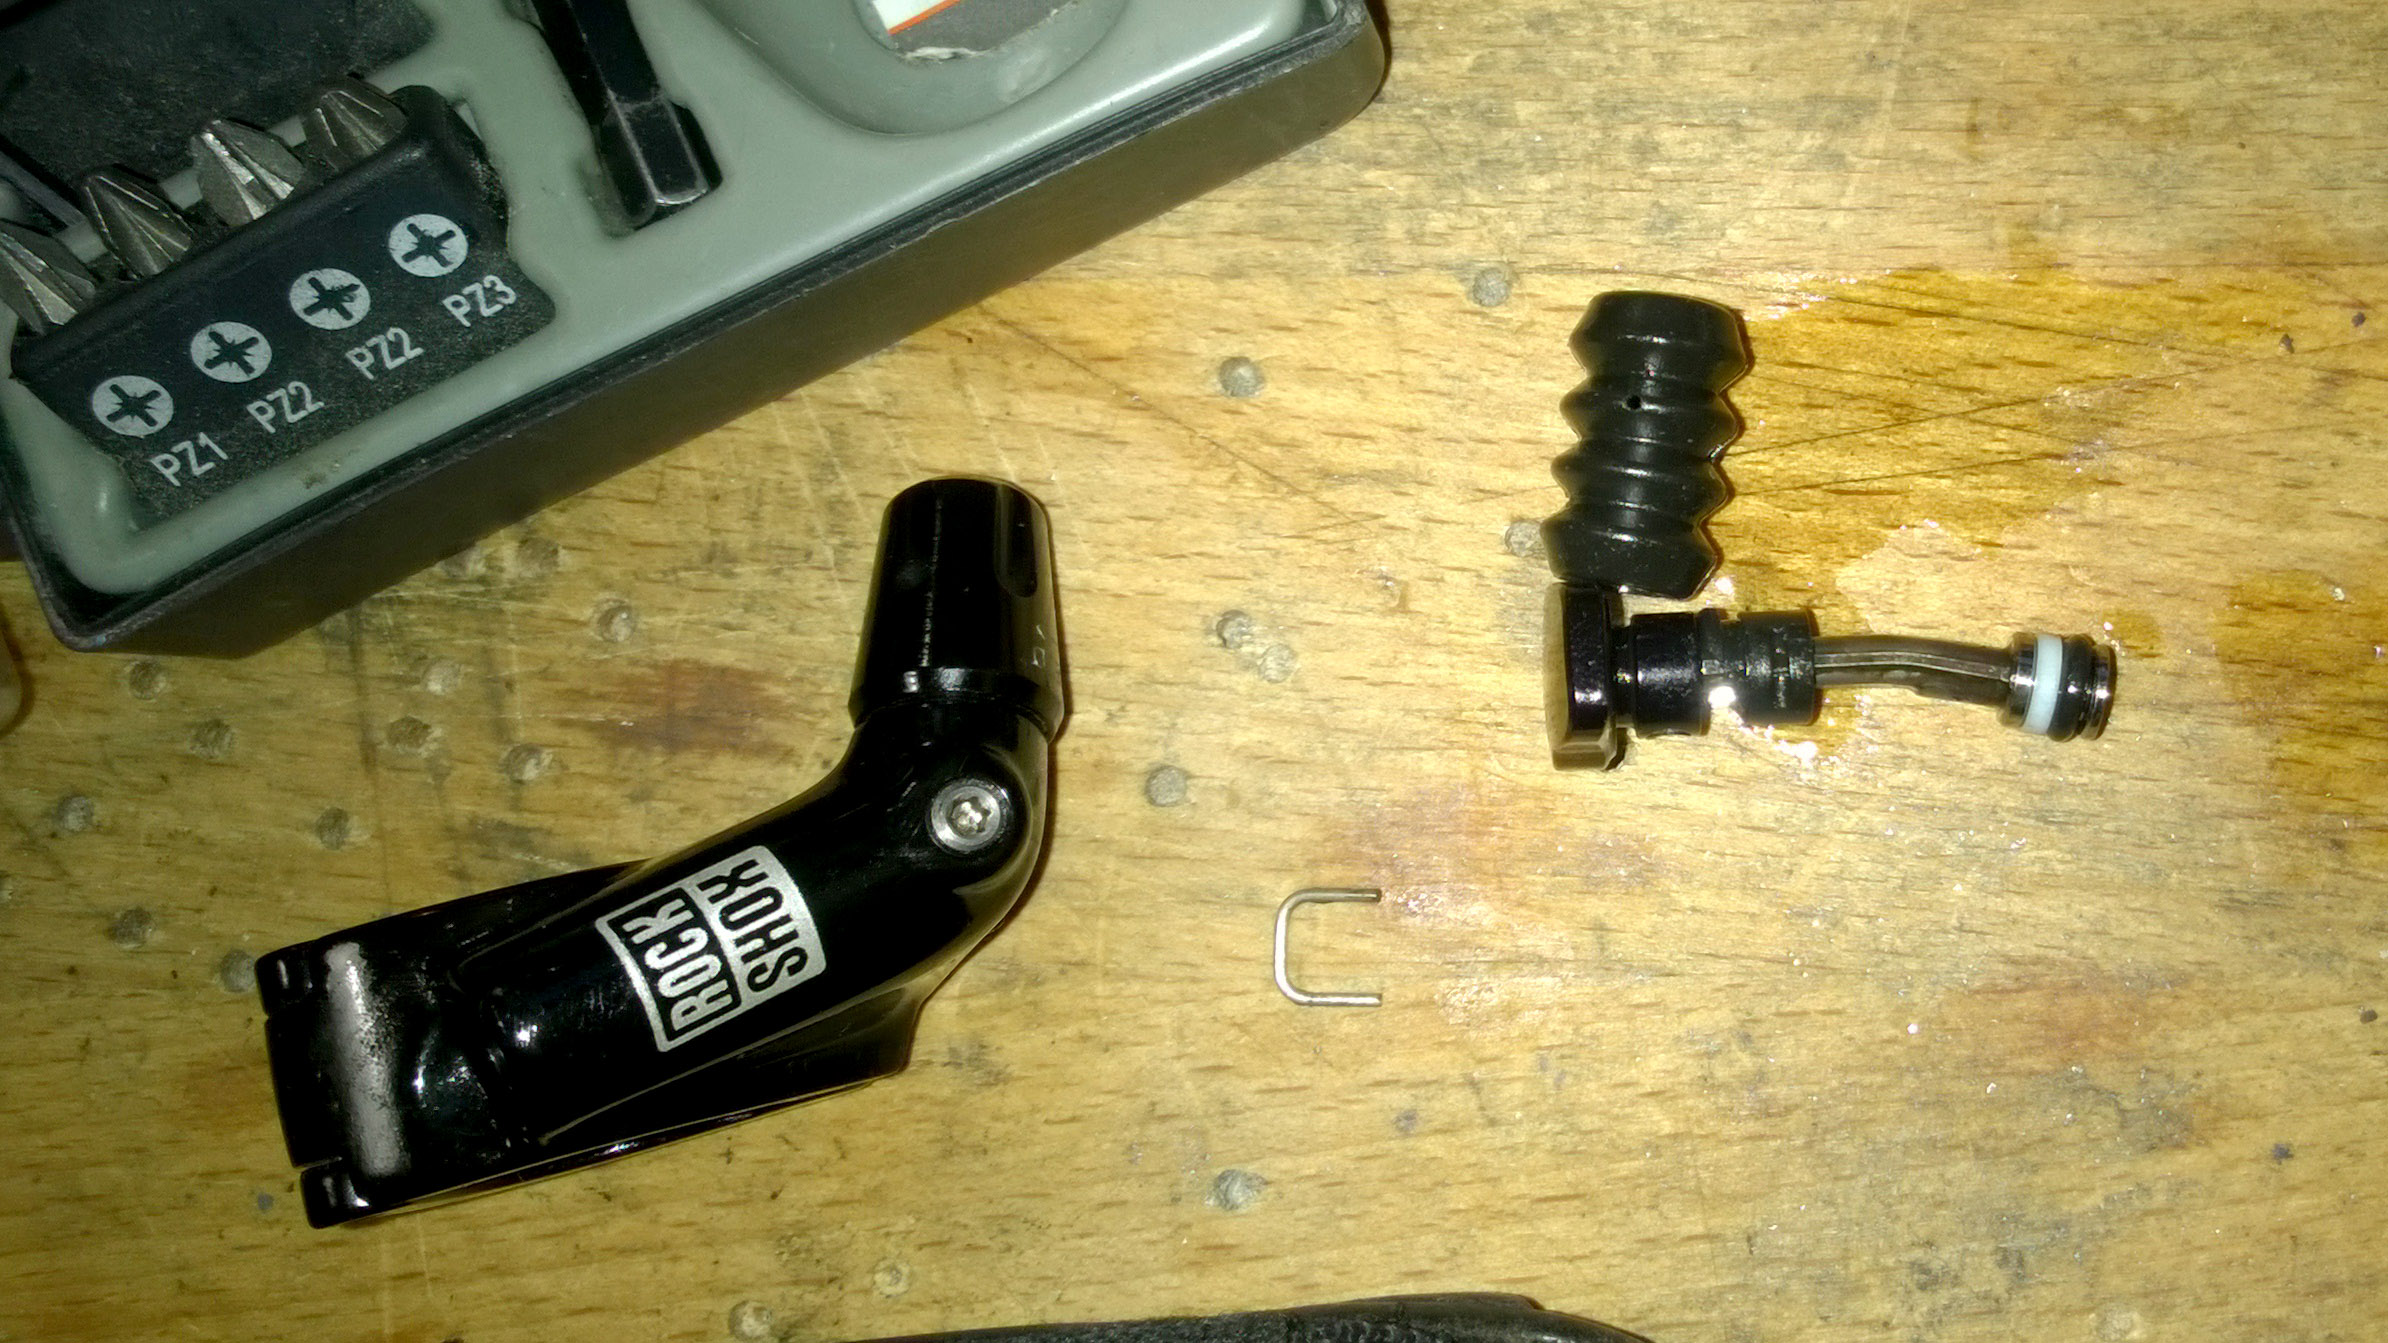
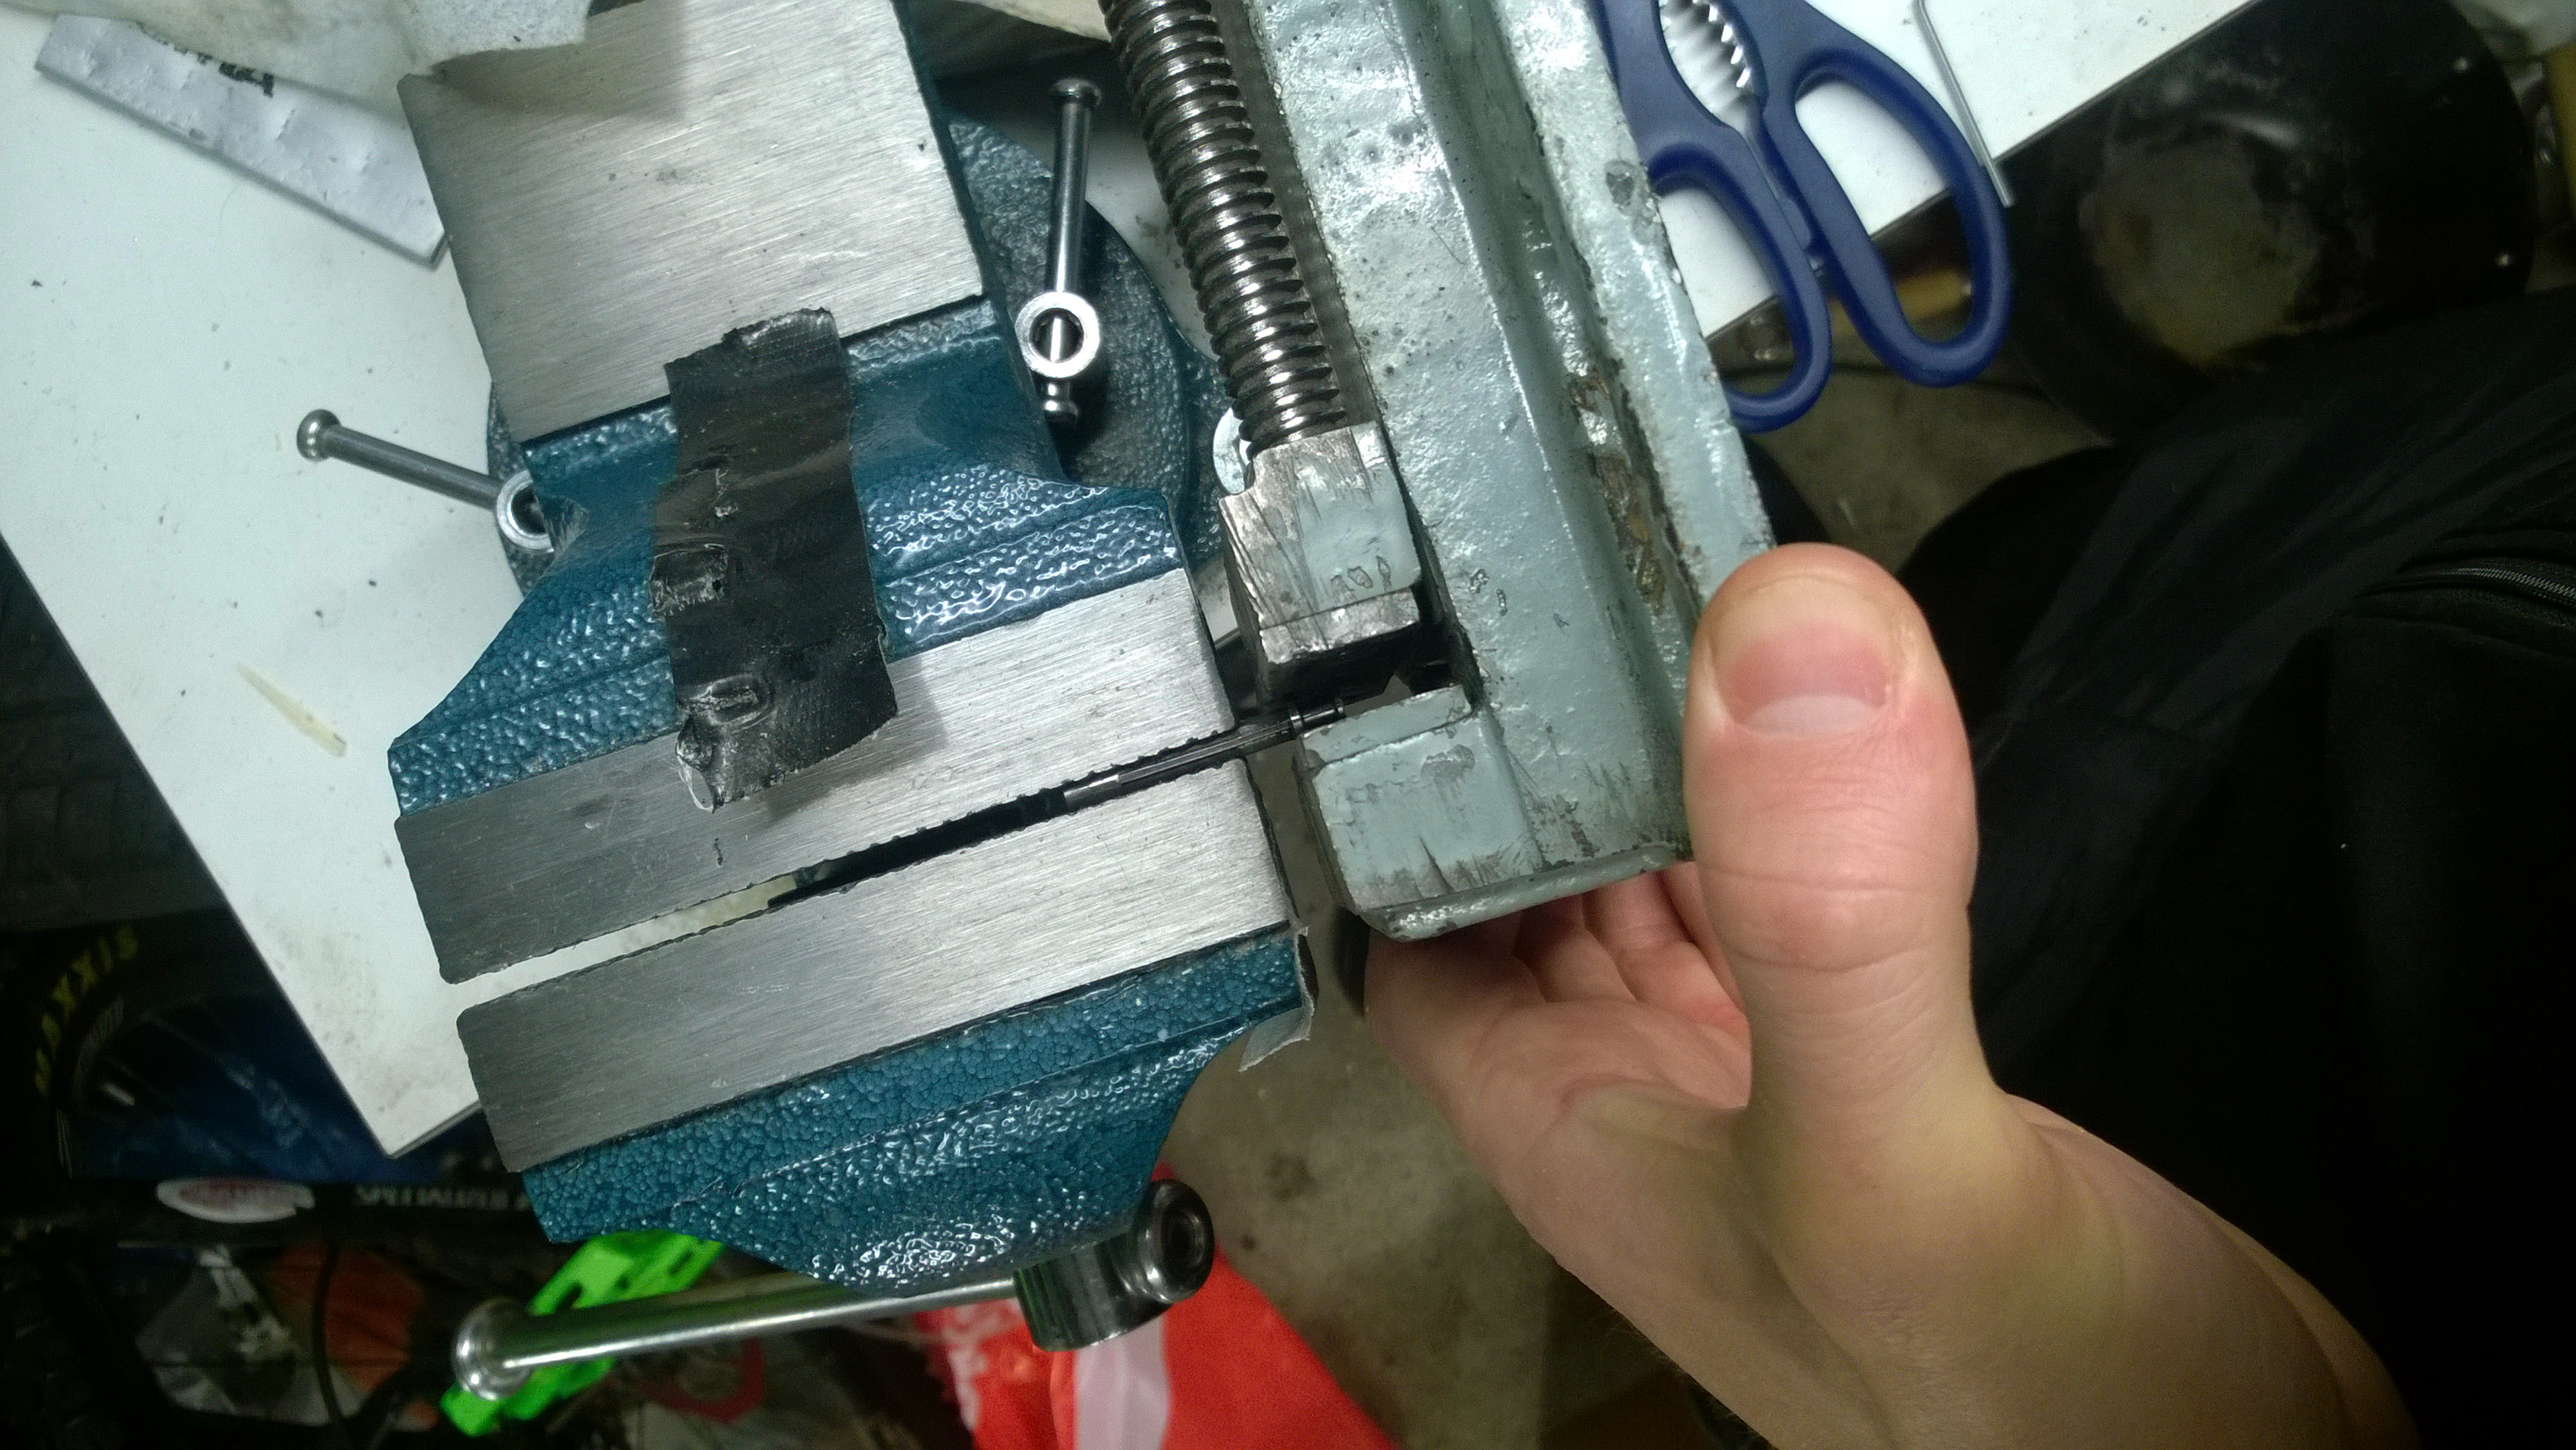
From outside I could tell that the remote had a bent piston and broken bushing. After the breakage, I could still use it a little on the rest of the ride, until it leaked too much and stopped working. The leakage resulted probably because the piston head was not perpendicular to the cylinder. Normally the bushing keeps the button level and guides the (straight) piston rod and centers it in the cylinder.
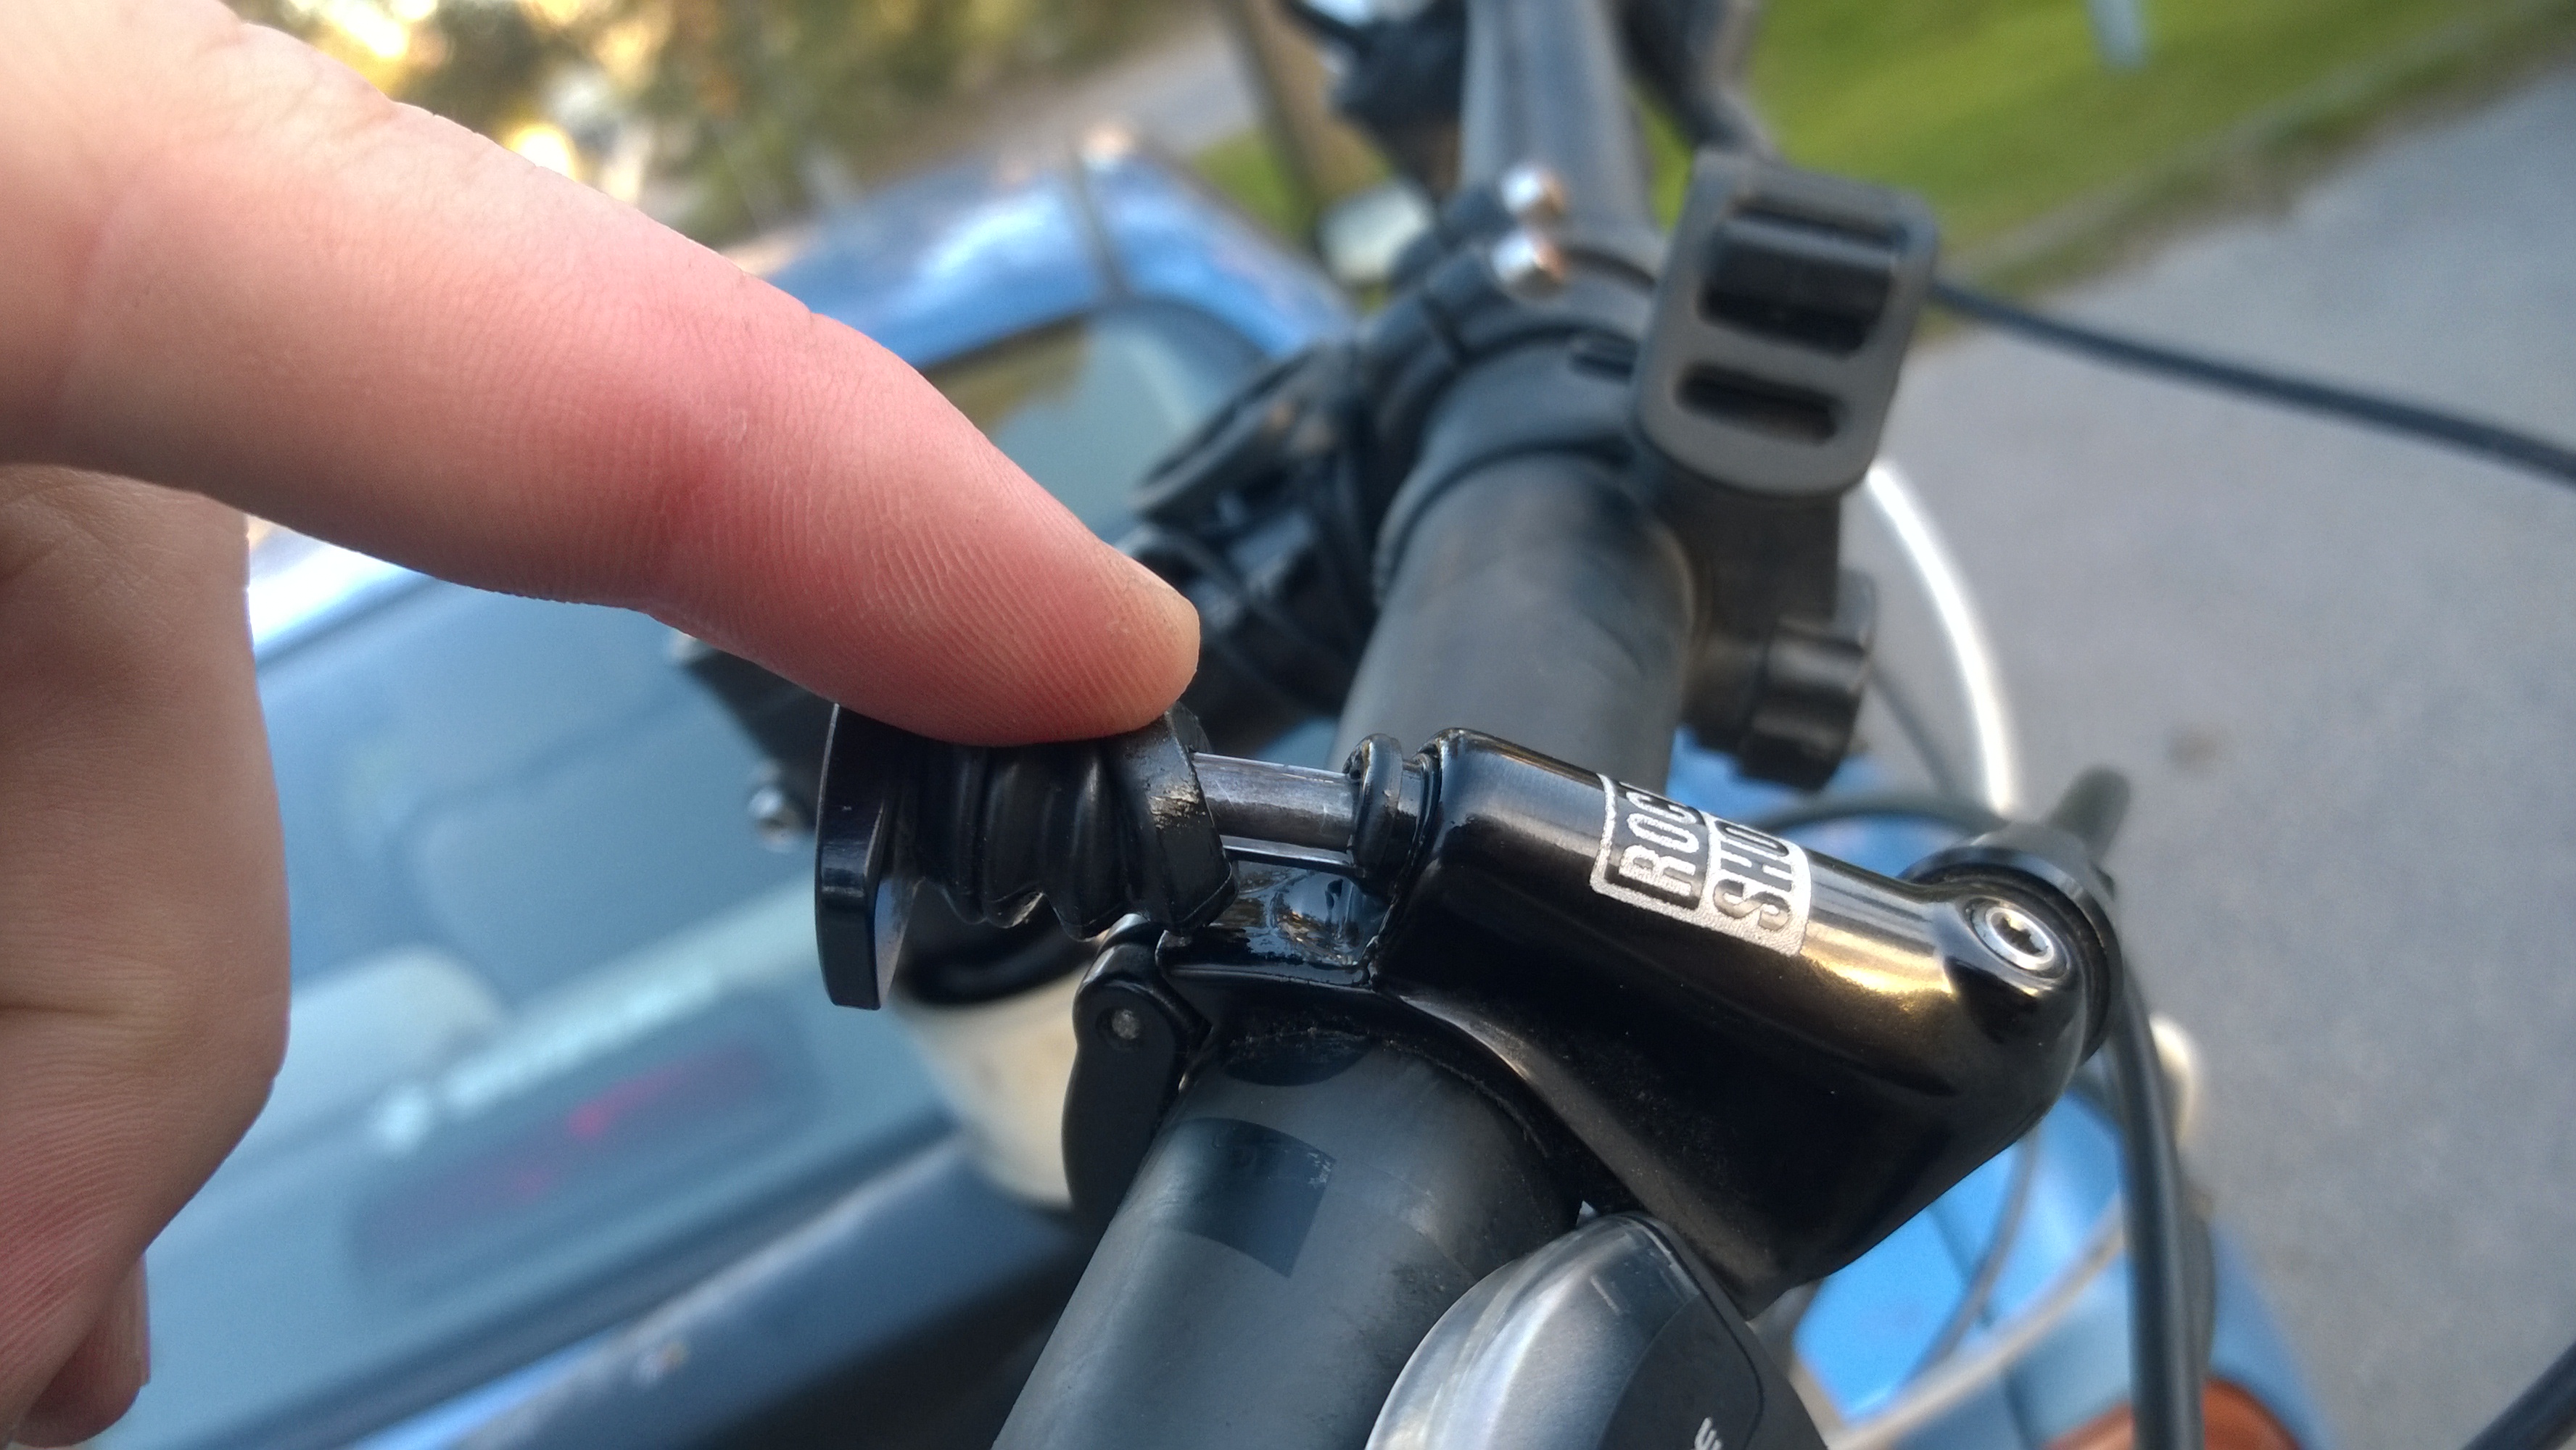
When I took the remote apart I also found that there were some scratches inside the cylinder, probably due to still using the remote after the initial breakage.
The button kit is pretty expensive and because of the scratches, I wasn’t sure if it would even be a sufficient fix. So at the time, I bought a new remote. As the remote in question was right handed (on top of the bar) I bought a left handed remote (even more expensive than the button kit 😛 ) to be mounted on the right side, but below the bar.
Now, after converting to 1×10 transmission, there is much more space on the left side and I have also used the remote on the right on my Enduro bike, which feels much more natural and can be positioned better (more space due to a missing transmission trigger). So I once again there was a need for a right handed remote to be mounted on the left side, but below the bar.
I had recently discovered that our local library has 3D Printers and you could reserve 1-4h slots to use the printer. Soon after, I realized that I could maybe create a new bushing with the printer, so I decided to give the broken remote a try, as I wouldn’t have to invest anything else than 0.40€ printing fee (and my time, of course).
First step was to try to un-bend the piston rod. Turned out, that it was pretty solid stuff, but with a help of vise (and a second vise, as I don’t have locking pliers) I could force it to somewhat straight again.
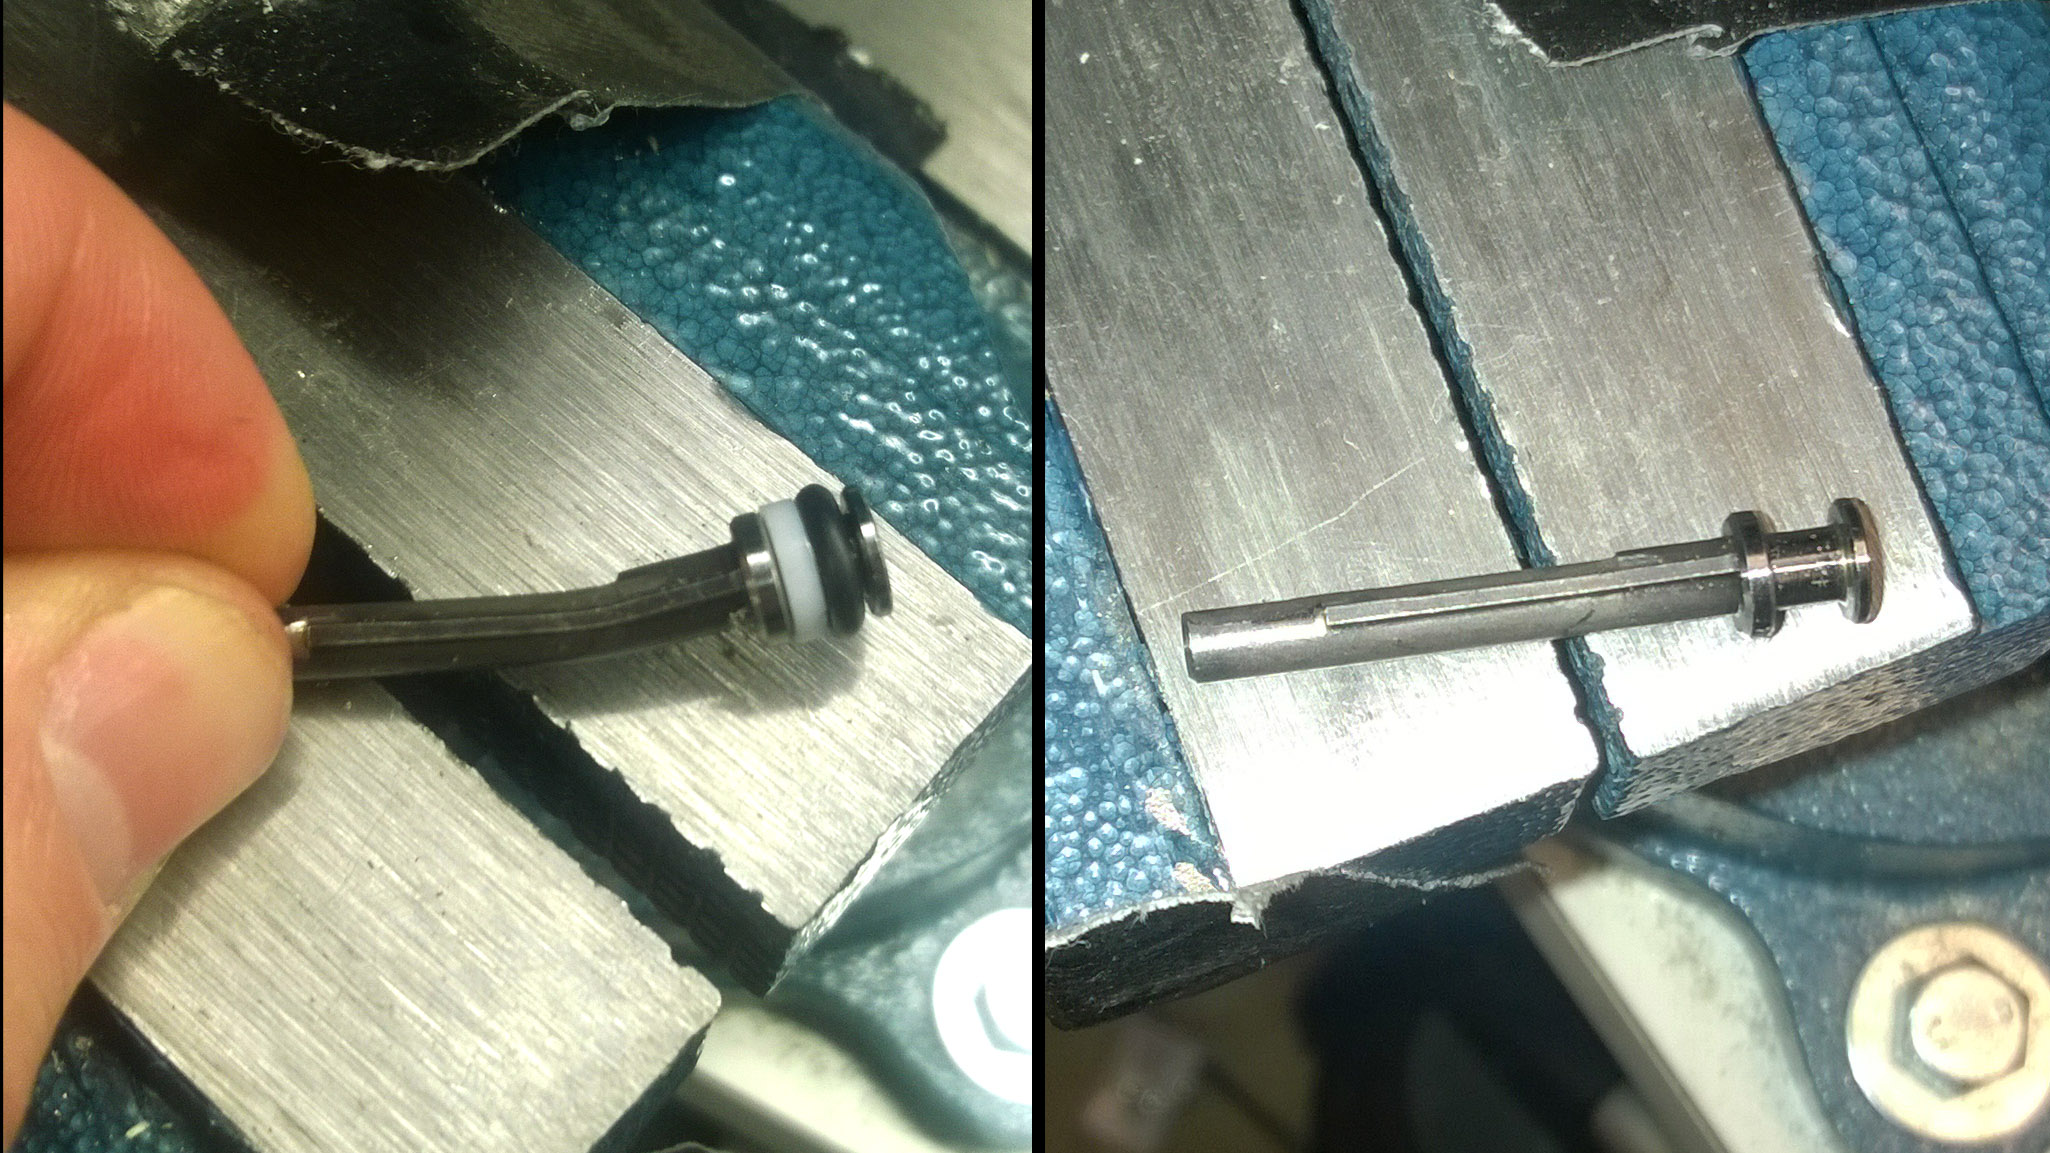
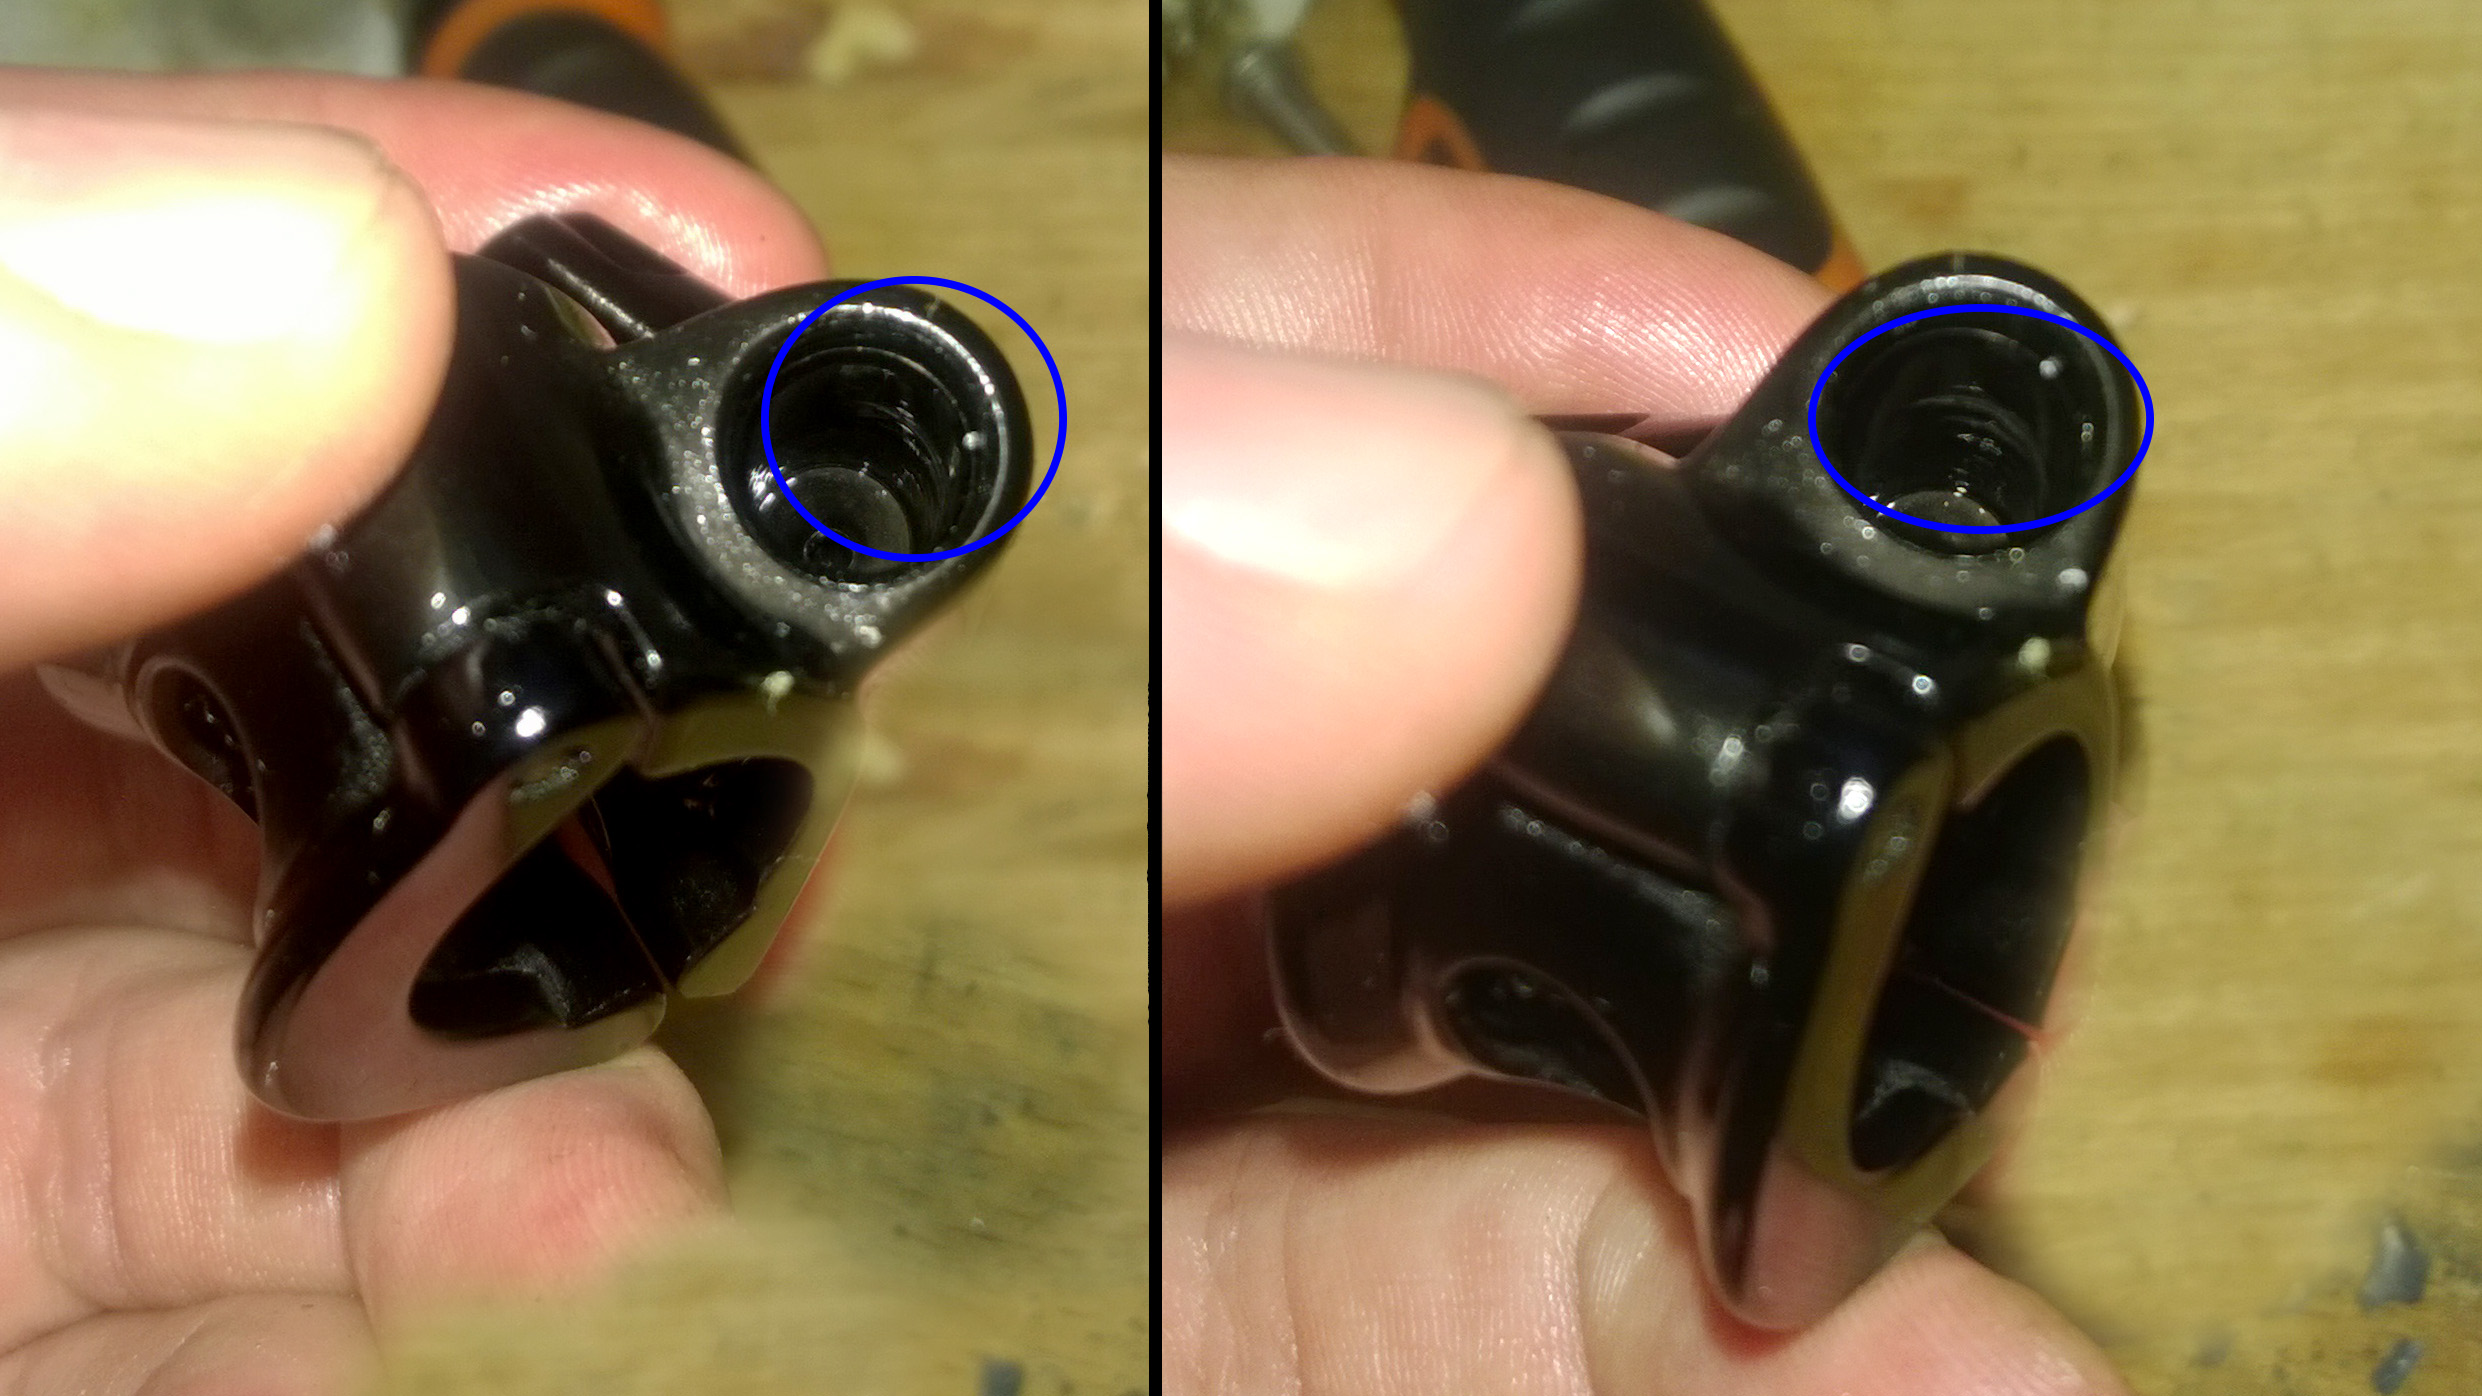
After the piston was straight, I took measurements from the piston and the bushing, and modeled the part in Autodesk Fusion 360.
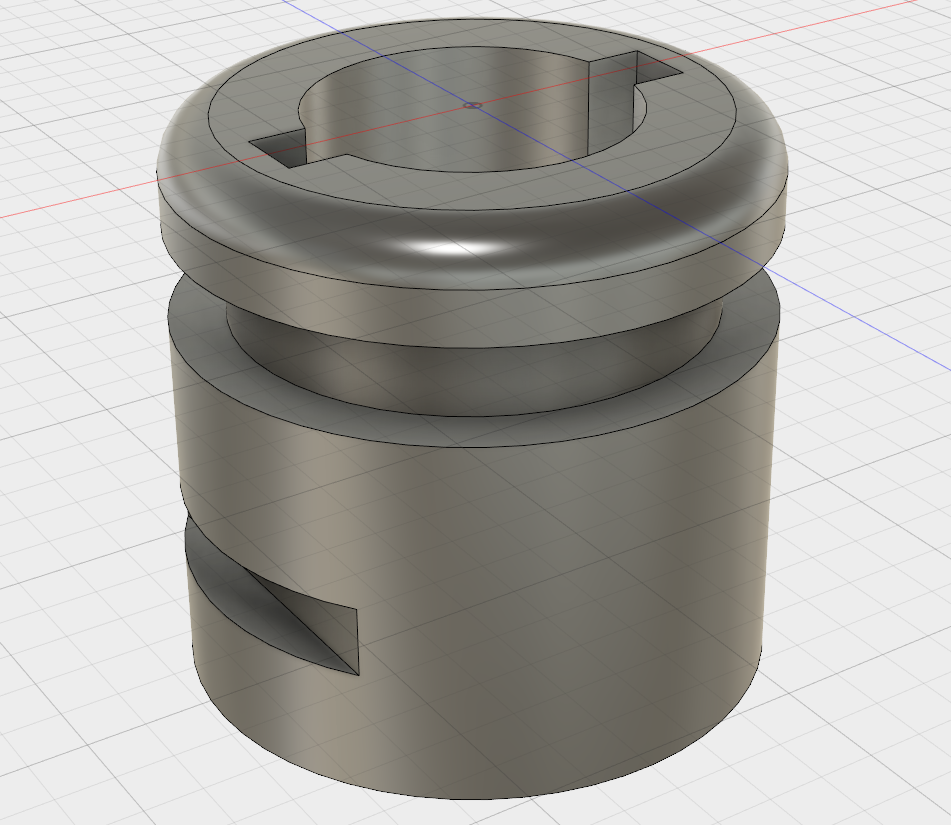
As the part was very small (8x8mm) and I hadn’t taken the printing process into account (causes “swelling” in concave shapes), the first print didn’t fit around the piston rod. It took few iterations, but I finally had printed a bushing that fits both around the piston rod and inside the remote body.
UPDATE: STL models for the bushing: measured from the old one and the print compensated
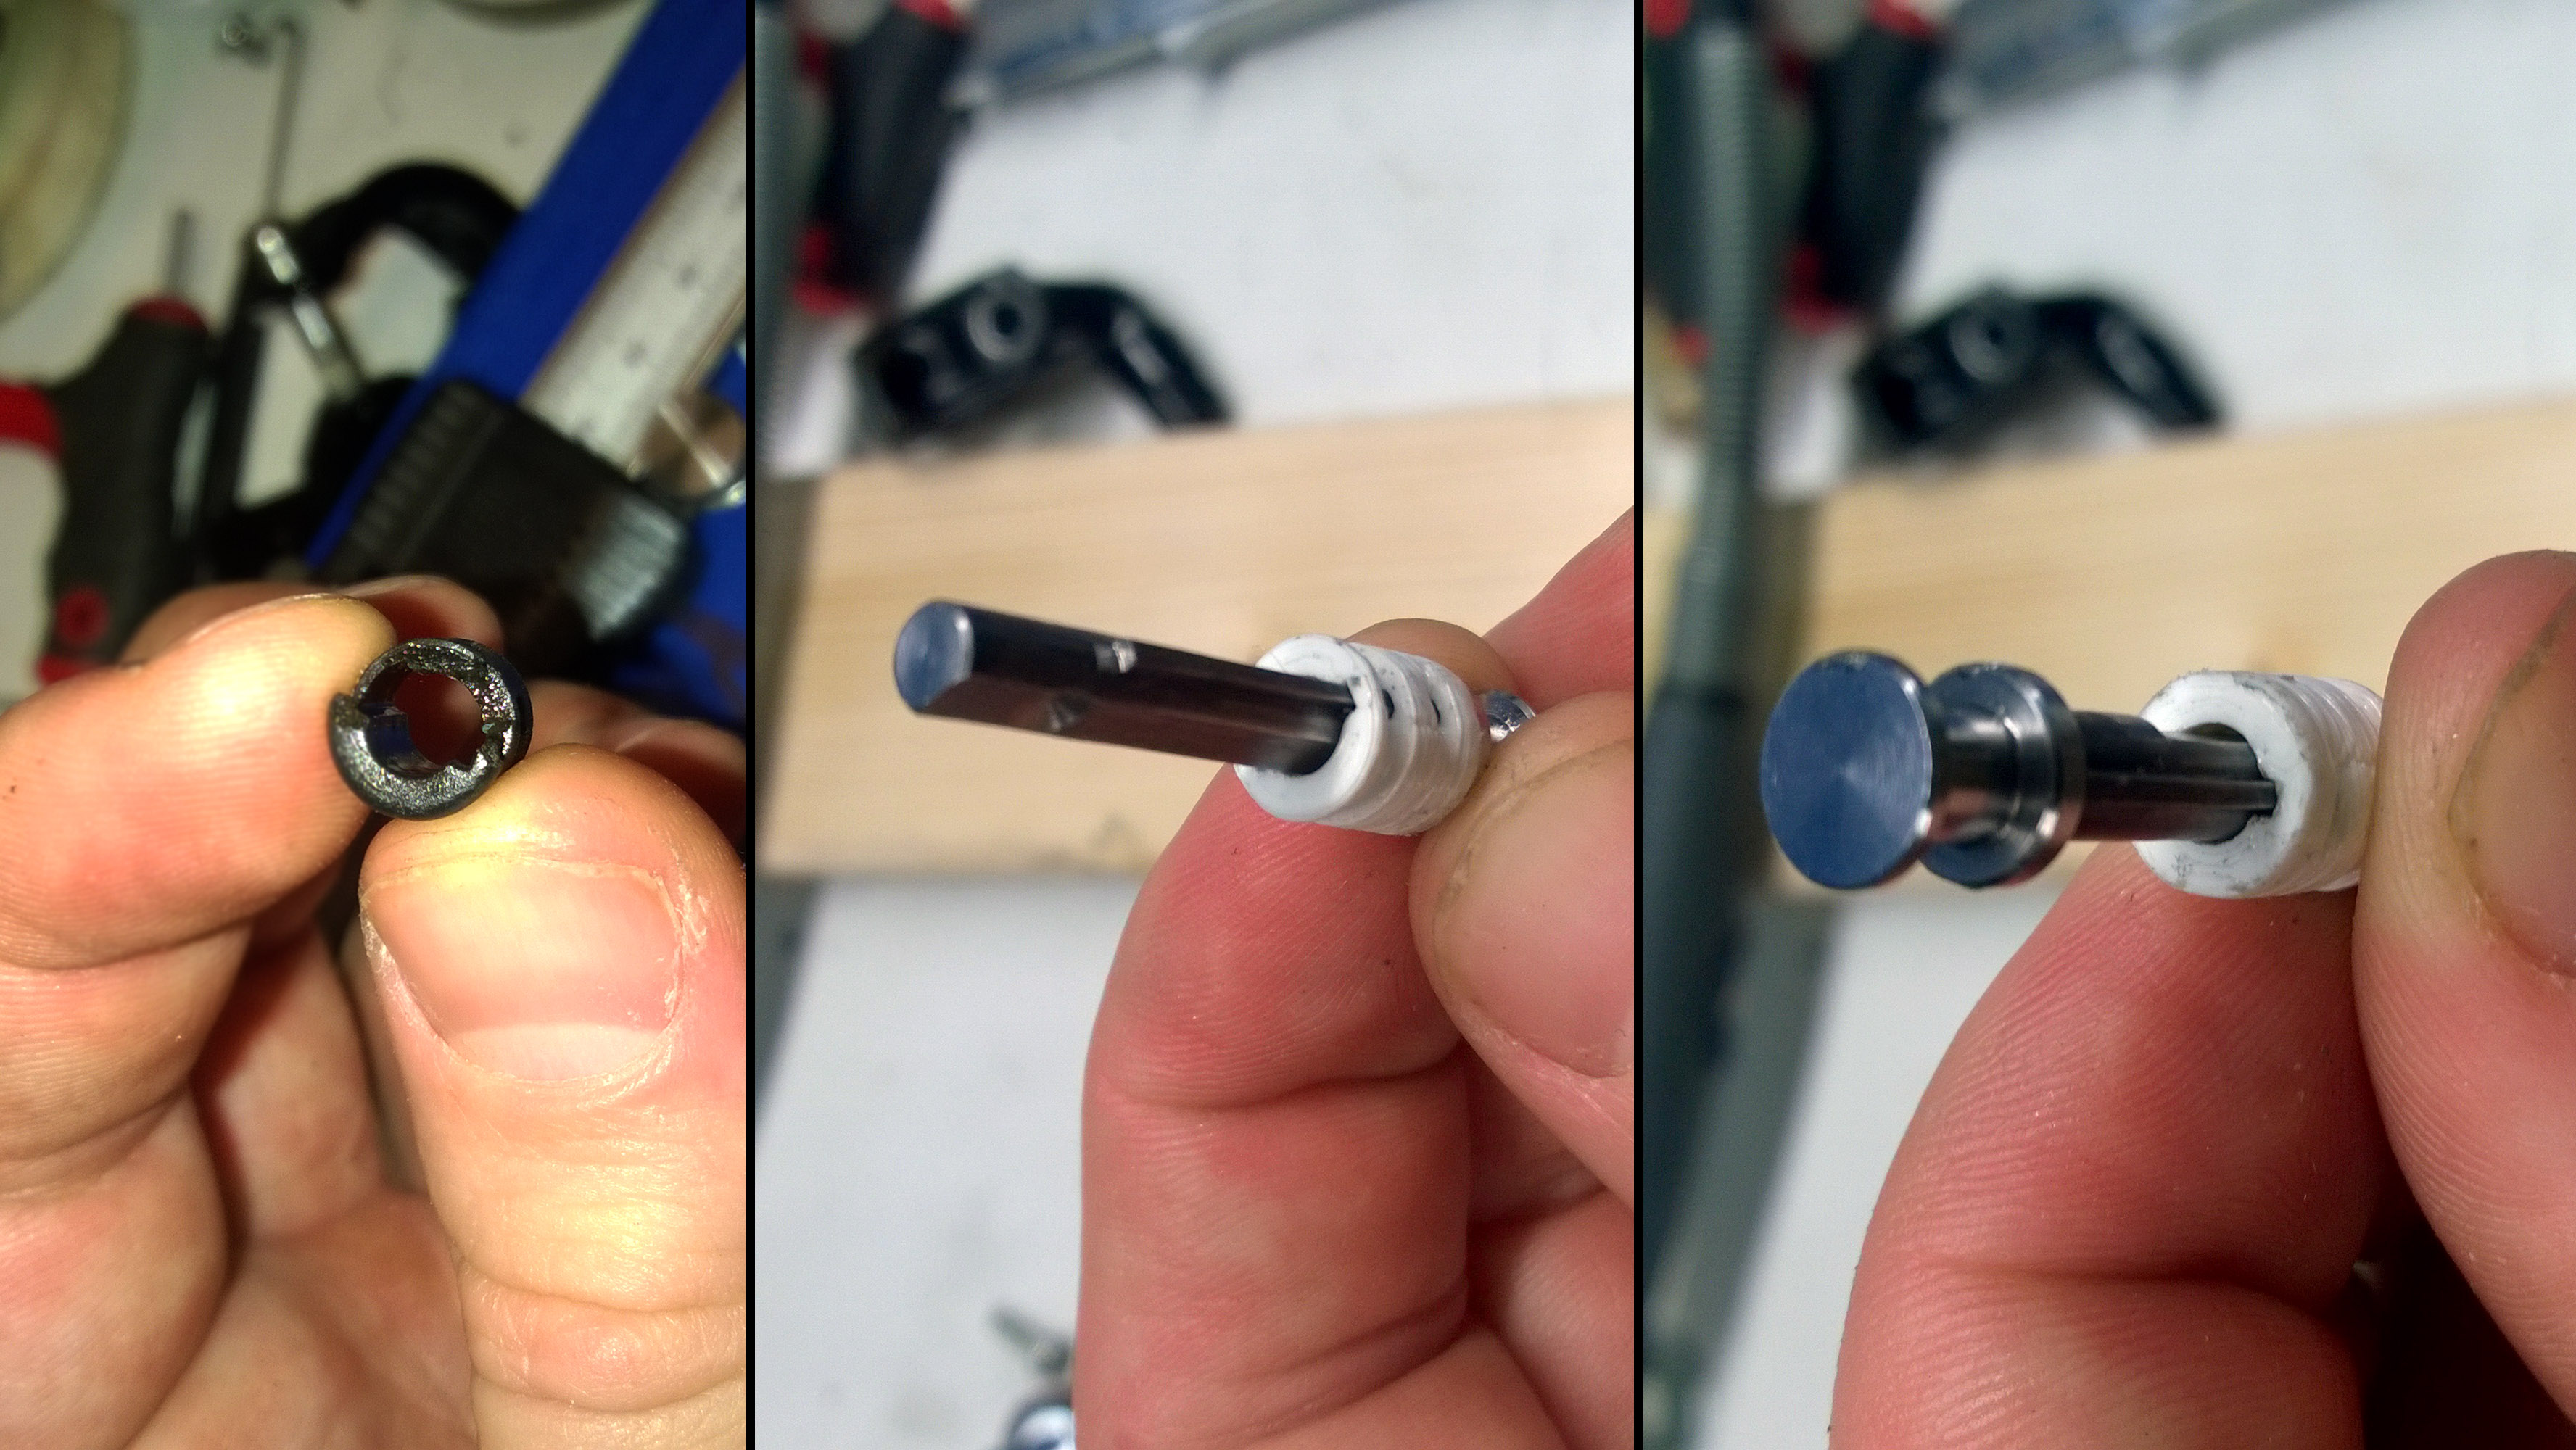

After the bushing was fitted, I assembled the remote with the rest of the parts (dust-cover and the button) and the installed it to the bike. After bleeding the remote it appears to work, what a success! I pressed it multiple times to see if the seal was holding with the scratches inside the cylinder, but didn’t recognize any softness caused by leaking. So I think it is good for riding and only time will tell if fix holds.

Hey there,
I have also damaged my remote and have access to a 3D printer, I was wondering if I could perhaps have the model for the bushing.
Hope this message reaches you!
Cheers,
James
Hi James, I updated the post with links to the stl files, both the 1:1 of the old bushing and the one that I used with compensation for 3D print “swelling”.
Hey there, I was wondering how you took the remote apart, I only see one screw which I’m pretty sure is for bleeding the dropper, thanks!